
This is my basic bake cheesecake recipe that I always use whenever I want to whip up a cheesecake for my family. The ingredients list does not include flour, sour cream or heavy cream but instead natural Greek yogurt is used. This recipe allows me to bake a cheesecake with no crack on the surface.
Please refer to notes below to achieve a smooth surface on your baked cheesecake.
Please refer to notes below to achieve a smooth surface on your baked cheesecake.
 |
| Cheesecake cooling in the cake pan |
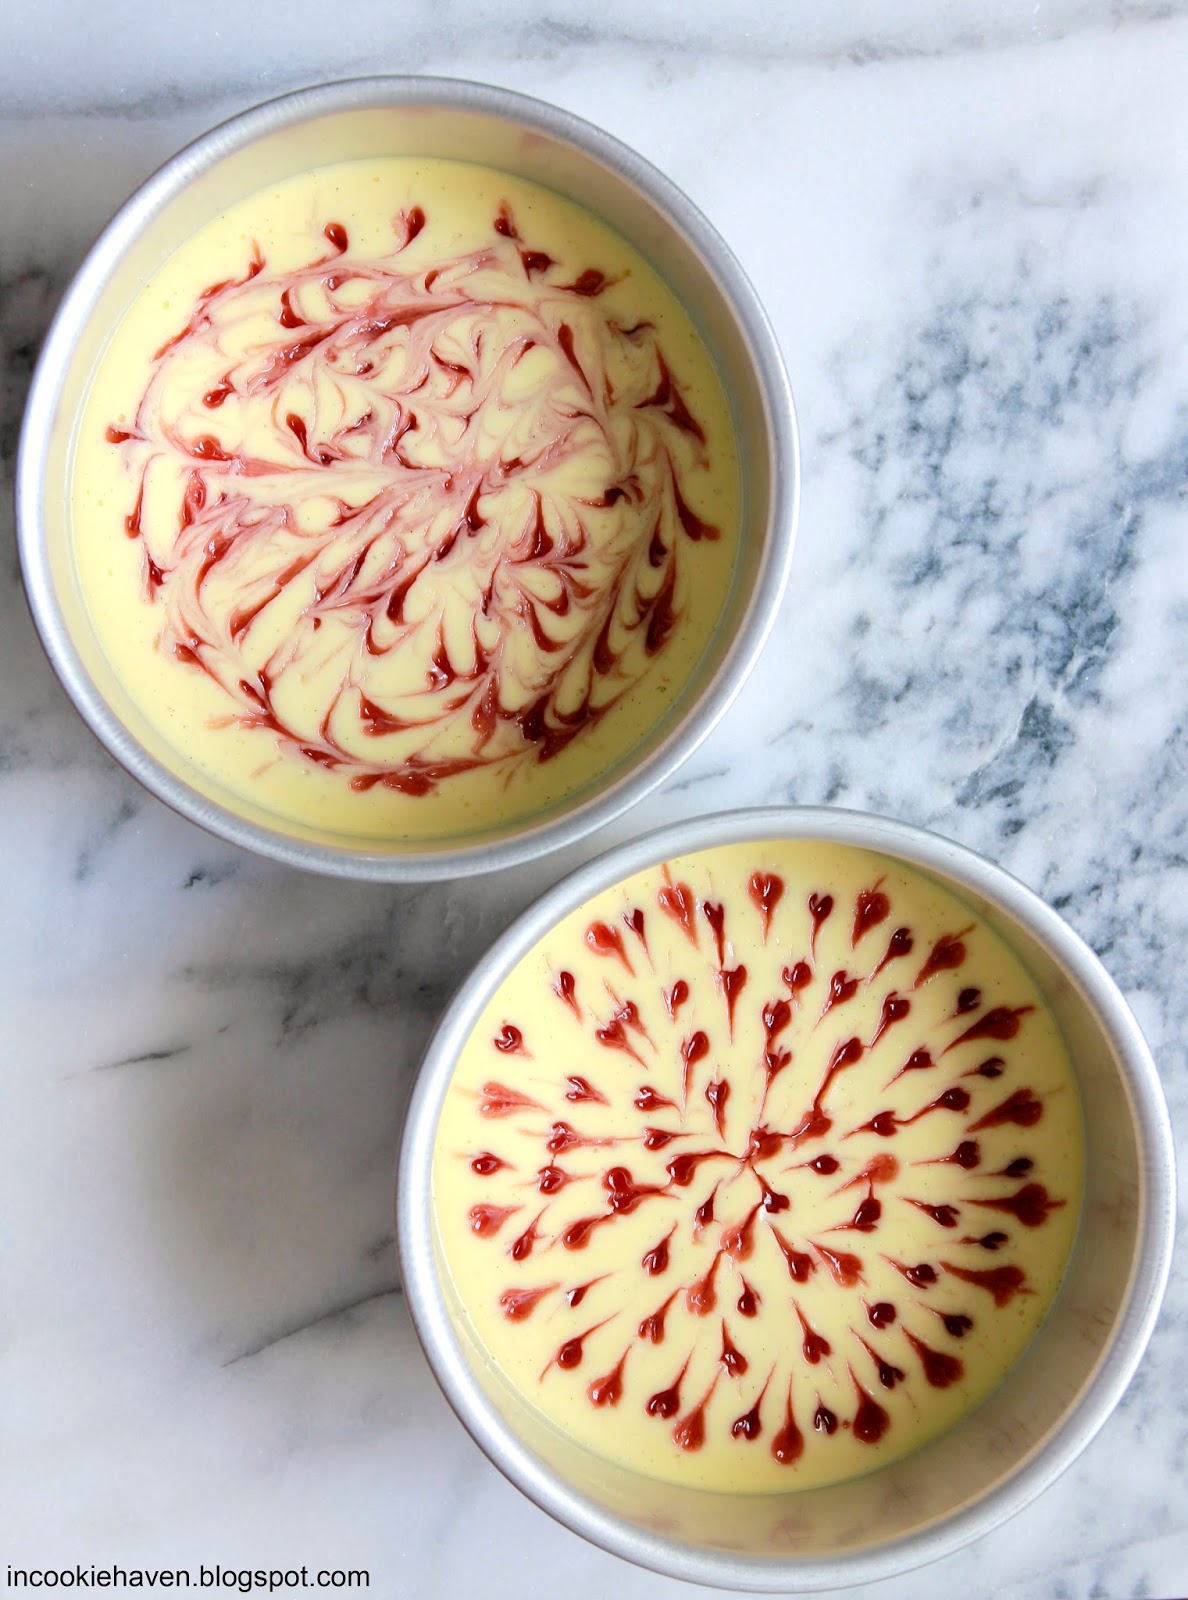
The swirls on the surface of the cake was done by pulling drops of raspberry jam using a toothpick. I liked how they turned out and love the heart shaped swirls more.

I ate the slice of cheesecake that was used for this photo shoot. I was rewarded with a smooth, lemon-y with a hint of raspberry flavour (from the jam) cheesecake layer sitting on a crunchy, sandy (in a very good way) with warm Speculoos spice biscuit base. I enjoyed the paring of flavors and contrast in textures.
Lemon Cheesecake with Raspberry Swirl
(makes 2 x 6" thinner cheesecake )
Ingredients:
Filling
500g cream cheese, room temperature
100g sugar
1/8 tsp salt
2 tsp vanilla paste or 1 Tbsp vanilla extract
2 tsp of lemon juice
2 tsp of lemon juice
3 eggs
90ml Greek yogurt, room temperature
Zest of 1 lemon
Base
25g butter, melted and cooled
150g Biscoff caramelized biscuits
Steps to base:
- Butter and line the base of a two 6" round pans. I used a regular cake pan as it will ensure that there will not be any leakage of water into the cake when placed into a water bath in the later steps.
- Preheat oven to 180 degrees C.
- Place caramelized biscuits into a zip lock bag and using a rolling pin roll over the bag to crush the biscuits into fine crumbs or you can use a food processor to crush the biscuit
- Pour the crushed biscuits into a mixing bowl and mix in the butter, until mixture resembles wet sand.
- Press the mixture evenly into the bottom of the cake pans and bake in the oven for 6 min. Cool and set aside.
Steps to filling:
- Turn the temperature of oven to 150 degrees C.
- In the bowl of a standing mixer fitted with a paddle attachment, beat the cream cheese, sugar, salt, vanilla paste or extract on medium-high speed, scrapping down the bowl several times until the mixture is completely smooth, about 5 min.
- Turn the mixer to low and beat in the eggs, one at a time, until blended, scrapping down the sides of the bowl after each addition. Beat in the Greek yogurt until blended.
- Pour the cream cheese mixture equally into both the cake pan that contained the cooled biscuit base.
- Boil some water in a kettle.
- Place the filled 6" cake pan in a roasting pan or a cake pan bigger than itself, like a 9" cake pan, this is to create a water bath for the cheese cake as it bakes.
- Place the roasting pan or the bigger cake pan in the center of the oven and very carefully pour the boiling water into the roasting pan or the bigger cake pan until the water is 3cm up the sides of the 6" cake pans.
- Bake until the filling is set but still jiggles slightly in the center, 18 - 20 min.
- Remove the cake from the water bath very carefully and let it cool to room temperature, 2 - 3h. Leave the cake to cool and do not move it. Then chill the cake in the fridge for 4 to 6 h, or preferably overnight, in the pan.
- Once totally chilled, heat up the base of the cake by placing it in hot water for 1 minute and invert the pan onto a 6" cake round or a large plate. Remove the pan from the cake and invert once more onto a 6" round or large plate so the crust is on the bottom.
Notes:
- Let all the ingredients, especially cream cheese, eggs and Greek yogurt, to come to room temperature before mixing.
- The water bath must cover at least 3cm from the base of the cake pan when baking. This ensures even and gentle heat while baking the cheesecake.
- Remove cake once 2cm of the side of the cake have set while the center of the cake jiggles slightly. As the cake cools, the residual heat will continue to set the cake.

Share the recipe with others through
or
Instagram: incookiehaven
No comments:
Post a Comment